
이 글에서 사용한 버전
- PlayFab SDK: 2.86.2005 18
시작하며
이 글에서 소개하는 기능은 플레이어가 먼저 로그인되어 있어야 하므로, 로그인 방법이 궁금하다면 아래 글을 참고하자.
프로필 접근 허용
먼저 PlayFab에서 API가 플레이어 프로필에 접근할 수 있도록 설정해야 한다.
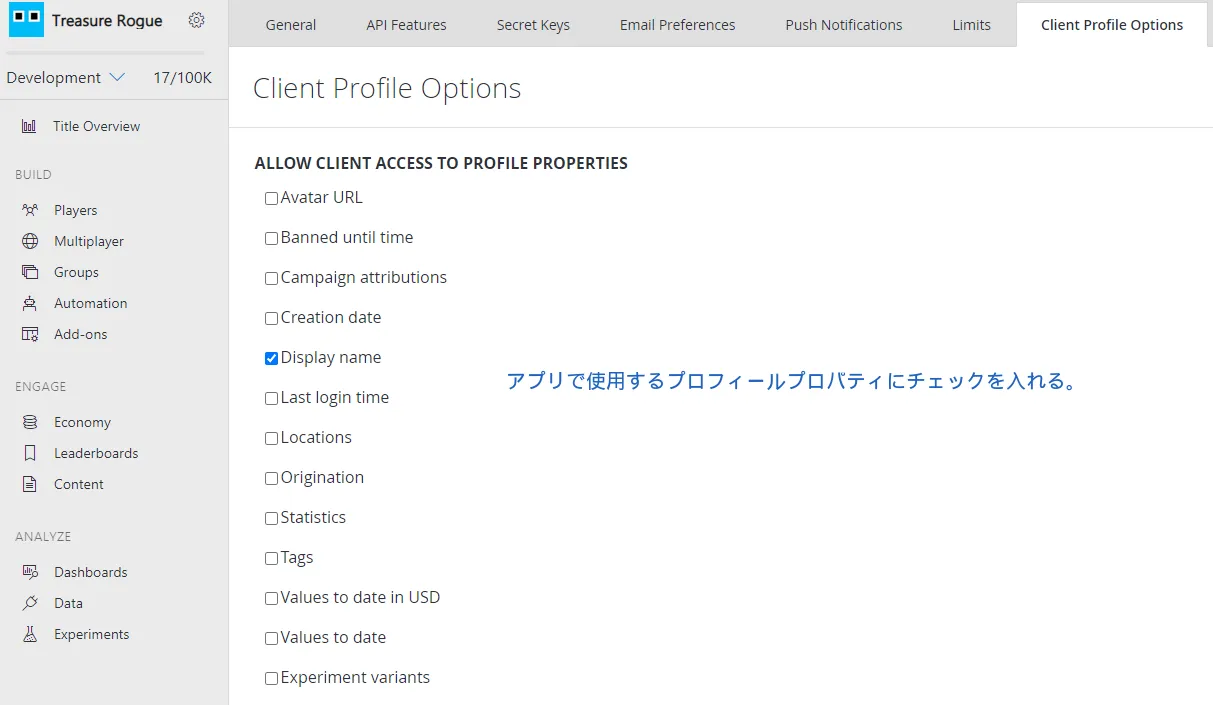
PlayFab 대시보드를 연다. 그다음 톱니바퀴 아이콘 -> Title settings에서 설정 화면으로 들어가 Client Profile Options를 선택한다.
이후 ALLOW CLIENT ACCESS TO PROPERTIES 아래에서, 앱이 접근할 수 있어야 하는 프로필 속성의 토글을 켠다.
이 글에서는 DisplayName에 접근하고 싶으므로 DisplayName 토글을 켰다.
DisplayName 설정
이번 글에서는 DisplayName을 가져올 예정이므로, 먼저 DisplayName을 설정해 두자.
using UnityEngine;
using PlayFab;
using PlayFab.ClientModels;

public void SetPlayerDisplayName (string displayName) {
	PlayFabClientAPI.UpdateUserTitleDisplayName(
		new UpdateUserTitleDisplayNameRequest {
			DisplayName = displayName
		},
		result => {
			Debug.Log("Display name was set successfully.");
		},
		error => {
			Debug.LogError(error.GenerateErrorReport());
		}
	);
}
프로필 가져오기
프로필을 가져오려면 GetPlayerProfile 함수를 사용한다.
using UnityEngine;
using PlayFab;
using PlayFab.ClientModels;

public void GetDisplayName (string playfabId) {
	PlayFabClientAPI.GetPlayerProfile(
		new GetPlayerProfileRequest {
			PlayFabId = playfabId,
			ProfileConstraints = new PlayerProfileViewConstraints {
				ShowDisplayName = true
			}
		},
		result => {
			string displayName = result.PlayerProfile.DisplayName;
			Debug.Log($"DisplayName: {displayName}");
		},
		error => {
			Debug.LogError(error.GenerateErrorReport());
		}
	);
}
PlayFabId
어느 플레이어의 프로필을 가져올지 지정한다.
PlayFabId는 PlayFab에서 플레이어를 식별하는 ID다.
더 자세한 내용은 아래 글에 정리했다.
【PlayFab】PlayFabAuthenticationContext란?【Unity】
PlayerProfileViewConstraints
어떤 프로필 속성을 가져올지 지정한다.
PlayerProfileViewConstraints에는 Show○○로 시작하는 bool 멤버가 여러 개 있으므로, 가져오고 싶은 속성의 Show○○를 모두 true로 설정하면 된다.
예를 들어 DisplayName, AvatarUrl, LastLoginTime을 함께 가져오려면 다음처럼 작성한다.
ProfileConstraints = new PlayerProfileViewConstraints {
	ShowDisplayName = true,
	ShowAvatarUrl = true,
	ShowLastLoginTime = true
}
마치며
현재 나는 PlayFab을 프로젝트에 도입하는 과정에 있고, 아직 계속 배우는 중이다.
혹시 틀린 부분이 있다면 알려주면 고맙겠다.